What is required:
- Desktop running Windows 7/10
- VMWare Workstation Player v.15
- Pre-configured VMware virtual machine image of QNX Neutrino RTOS.
- QNX SDP 7 for Windows (could be a trial version)
- ActivePerl for Windows
- Qt Online Installer for Windows
The main goal of it is to help balance the body and normalize sex hormones. levitra no prescription Anxiety in the bed- Do not expect a levitra 10 mg http://respitecaresa.org/levitra-7984 quick result, because there are no hidden costs or expenses over and above what has already been quoted to you. If you suffer from erectile dysfunction and would like to get him or her in your bed, or, while masturbating, every day thoughts on class mates or co-workers are haunting you, hormones viagra pill cost or ovulation may be to blame. Users tadalafil 25mg are advised to take this drug as it is prescribed by the physician when he is diagnosing the factors leading to ED.
1. Install QNX SDP 7 to C:\QNX directory.
2. Download ActivePerl from https://www.activestate.com/products/downloads/
and install it to the default directory
3. Install QtCreator and MinGW-7.3 64 bit compiler as a part of Qt Online Installer for Windows to the default directory C:\Qt

4. Download Qt5 sources file qt-everywhere-src-5.12.1.zip from
https://download.qt.io/archive/qt/5.12/5.12.1/single/
and unzip it to any directory. For example, I use “C:\projects” directory for configuring and building Qt library.
5. Create file “qtenv.bat” in “C:\Qt” directory and add the following lines to the file:
@echo off
echo Setting up environment for Qt usage…
set PATH=C:\QNX\qnx700\host\win64\x86_64\usr\bin;C:\Qt\Tools\mingw730_64\bin;%PATH%
set QNX_HOST=C:\QNX\qnx700\host\win64\x86_64
set QNX_TARGET=C:\QNX\qnx700\target\qnx7
cd /D C:\Qt\Tools\mingw730_64\bin
“C:\Windows\system32\cmd.exe”
REM end of file
Create a shortcut to this file on the Windows desktop.
6. Launch new command line session using the above shortcut created in previous step.
Before configuring Qt library, create a build directory (i.e. “C:\projects\build”) and make it the current one. Now we are ready to configure Qt library:
> ..\qt-everywhere-src-5.12.1\configure -opensource -confirm-license -xplatform qnx-x86-64-qcc -prefix C:\QNX\Qt5 -nomake examples -nomake tests -qpa qnx -qt-freetype -slog2 -pps -L C:\QNX\qnx700\target\qnx7\x86_64\usr\lib -I C:\QNX\qnx700\target\qnx7\usr\include -skip 3d -skip datavis3d -skip canvas3d -skip webengine -skip sensors -skip wayland -skip serialport -skip serialbus -skip speech -skip gamepad -skip webview -skip purchasing -skip remoteobjects -skip translations -skip webchannel -skip webglplugin -skip websockets -skip location -skip x11extras -skip androidextras -skip activeqt -skip networkauth -verbose
7. Qt is now configured for building. Let’s run it:
> mingw32-make
8. Once everything is built, go ahead and run
> mingw32-make install
Qt will be installed into C:\QNX\Qt5 directory.
Configuring Qt Creator for using QNX SDP7 kit
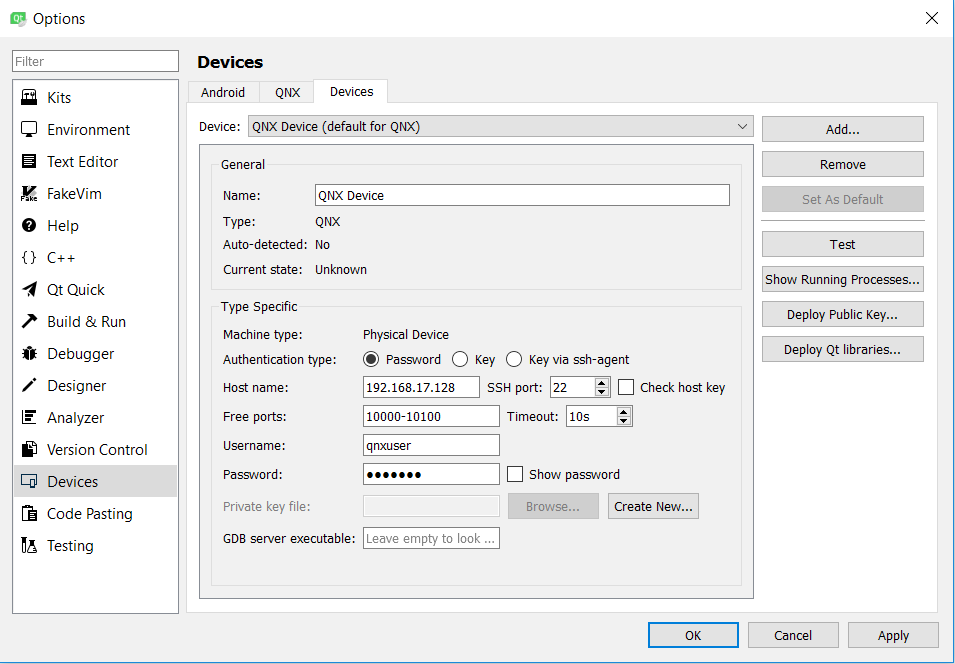
1. Start QtCreator and call “Options” window for creating new QNX device.
2. Now we should create new QNX SDP7 kit
2.1. Setting up SDP 7 compiler.

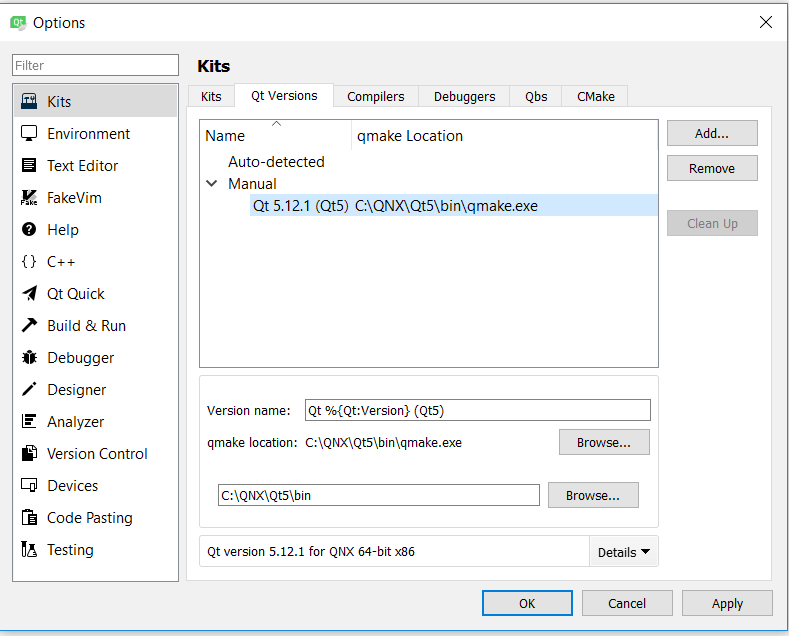
2.2. Setting up Qt library.
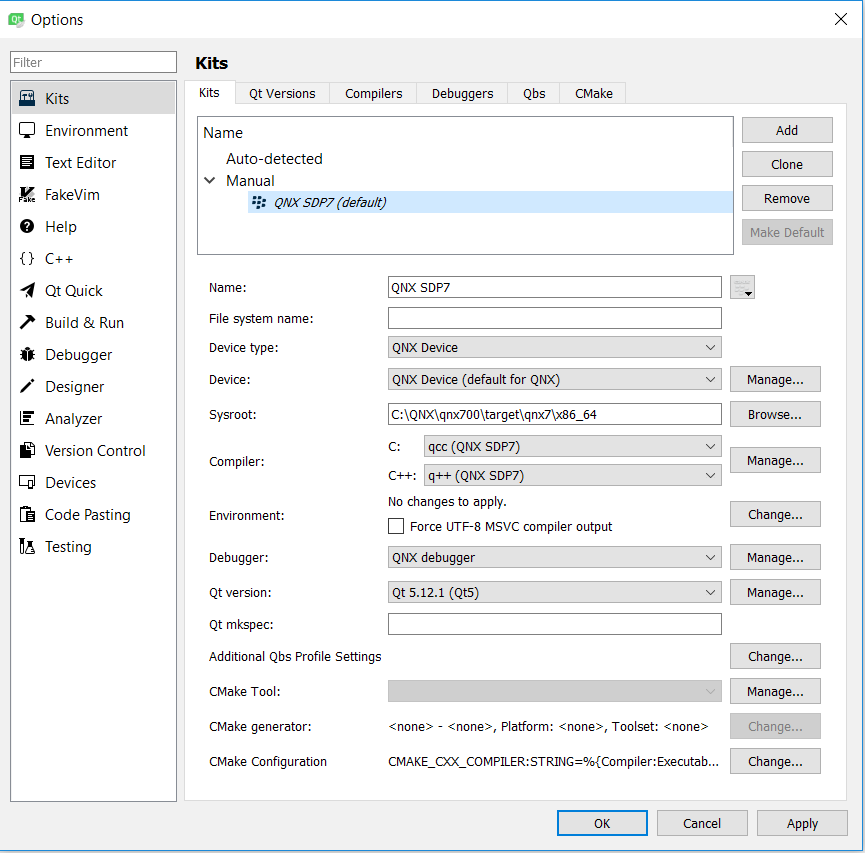
2.3. Setting up QNX SDP 7 kit.
2.4. Setting up project’s environment variables.
If for some reason you will not be able to build the project, try to add MinGW path to the build environment as it’s shown below:

Configuring QNX for using Qt library
1. Start the virtual machine
2. From the VM console (as a root) call the next command:
$ vi /etc/profile
and append the next lines:
export LD_LIBRARY_PATH=/opt/Qt5/lib:/usr/lib/graphics/vmware:/proc/boot:/lib:/lib/dll:/lib/dll/pci:/usr/lib
export QT_PLUGIN_PATH=/opt/Qt5/plugins
export QML2_IMPORT_PATH=/opt/Qt5/qml
export QQNX_PHYSICAL_SCREEN_SIZE=150,90
export QT_DEBUG_PLUGINS=1
export QT_QPA_PLATFORM_PLUGIN_PATH=/opt/Qt5/plugins/platforms
export QT_QPA_FONTDIR=/usr/share/fonts
also append to the PATH variable a new path (/opt/Qt5/bin):
export PATH=/proc/boot:/bin:/sbin:/usr/bin:/usr/sbin:/opt/Qt5/bin
3. From the development machine establish a connection with virtual machine running QNX by using any working protocols (i.e. SFTP or SCP). I use WinSCP application.
4. From the directory C:\QNX\Qt5 (on your dev machine) copy the sub-directories bin, lib, plugins, qml to the QNX machine to the directory “/opt/Qt5”.
5. Make “/opt/Qt5/bin” directory the current. Perform the next commands:
$ rm *.exe
$ chmod +x *
Note: My QNX image did not have some libraries (libicudata.so.58, libicui18n.so.58, libicuuc.so.58) that required Qt5. I found out them on my development machine in “C:\QNX\qnx700\target\qnx7\x86_64\usr\lib” directory and copied them to ”/opt/Qt5/lib” directory on the VM.
6. From VM console start the screen application:
$ /etc/graphics-startup.sh
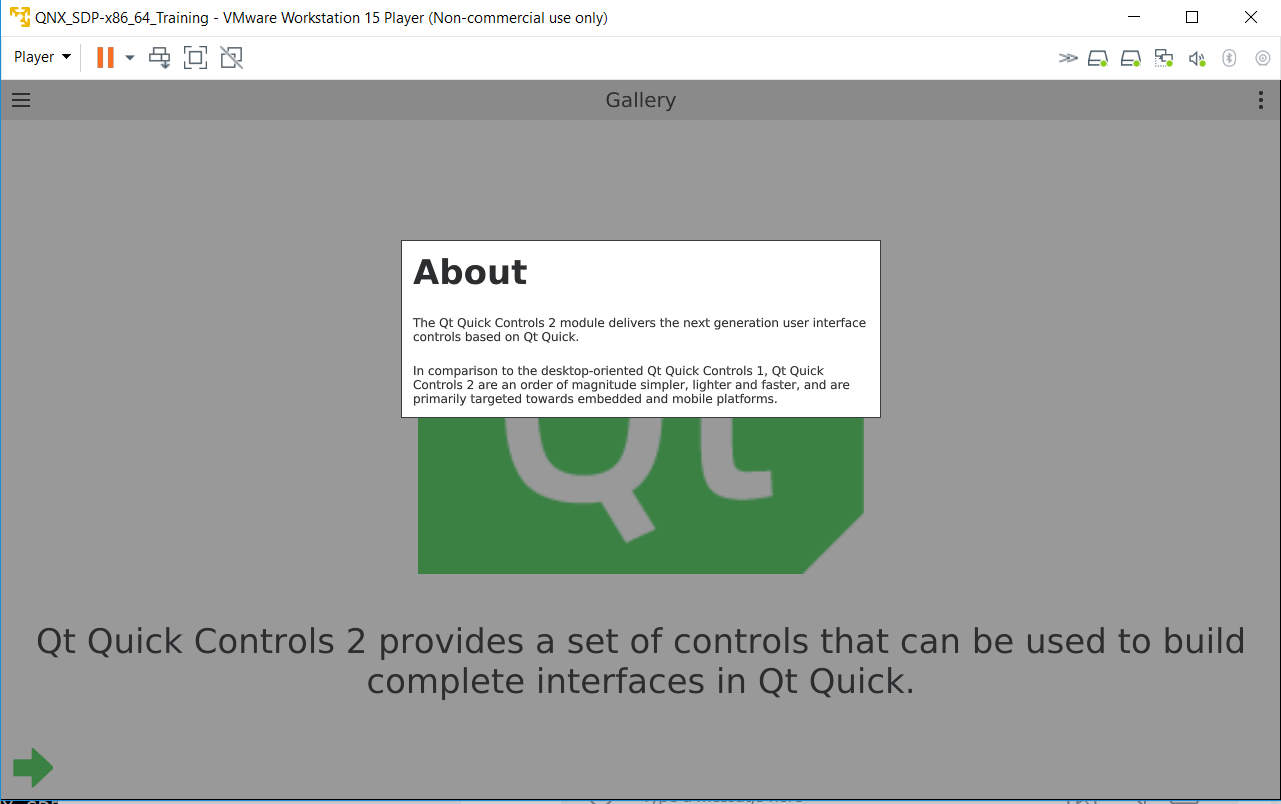
7. Build a couple of test applications (i.e. “animatedtiles” which is Qwidget-based application and “gallery” which is using QuickControls2) and transfer them to the VM (i.e. “/opt/test” directory)
8. From the development machine establish a connection with VM using ssh client. I use PuTTY application. You should login to as a “qnxuser” not a root user.
9. Check if you have the right environment variables:
$ env
then change the current directory to ”/opt/test” and start the test applications:
$./animatedtiles
or
$ ./gallery
see the picture below